-
7. React TDD 를 이용한 간단한 앱 생성 및 배포React 2023. 5. 22. 19:09
TDD를 이용해서 만들 앱 소개

-> '+', '-' 그리고 on/off 버튼이 있다.
-> '+' 를 누르면 숫자가 올라가고 '-' 를 누르면 숫자가 내려간다.
-> on/off 버튼을 누르면 '+', '-' 버튼이 작동을 안하고 색깔이 변한다.
앱 만들기 시작
1. Counter 생성
-> Counter 는 0부터 시작.
-> App.test.js
import { render, screen } from '@testing-library/react';
import App from './App';

test('the counter starts at 0', () => {
  render(<App />);
  const counterElement =screen.getByTestId("counter");
  expect(counterElement).toBe(0);
});
-> 테스트에 대응하는 실제 코드 작성 : App.js
import logo from './logo.svg';
import './App.css';
import { useState } from 'react';

function App() {
  const [count, setCount] = useState(0);
  return (
    <div className="App">
      <header className="App-header">
        <h3 data-testid="counter">{count}</h3>
      </header>
    </div>
  );
}

export default App;
-> 테스트 실행 : Fail
-> 테스트 코드 수정 : App.test.js
import { render, screen } from '@testing-library/react';
import App from './App';

test('the counter starts at 0', () => {
  render(<App />);
  const counterElement =screen.getByTestId("counter");
  expect(counterElement).toHaveTextContent(0);
});
플러스, 마이너스 버튼 생성
1. '+', '-' 버튼을 생성.
-> App.test.js
test('minus button has correct text ', () => {
  render(<App/ >);
  const buttonElement = screen.getByTestId("minus-button");
  expect(buttonElement).toHaveTextContent("-");
});

test('plus button has correct text ', () => {
  render(<App/ >);
  const buttonElement = screen.getByTestId("plus-button");
  expect(buttonElement).toHaveTextContent("+");
});
-> App.js
        <button data-testid="minus-button">-</button>
        <button data-testid="plus-button">+</button>
플러스, 마이너스 버튼 기능 넣기(fire event)
1. FireEvent API
: 유저가 발생시키는 이벤트에 대한 테스트를 해야 하는 경우 사용.
-> 유저이벤트를 사용하는 것이 더 좋으나, 이번에는 이것을 사용해보기로 !
2. 버튼 생성
-> '+' 버튼을 누르면 숫자가 1로 변함
-> App.test.js
test('When the + button is pressed, the counter changes to 1', () => {
  render(<App/ >);
  const buttonElement = screen.getByTestId("plus-button");
  fireEvent.click(buttonElement);
  const counterElement = screen.getByTestId("counter");
  expect(counterElement).toHaveTextContent(1);
});
-> App.js
        <button data-testid="minus-button">-</button>
        <button data-testid="plus-button"
        onClick={()=>setCount(prev=> prev + 1)}>+</button>
=> '-' 버튼도 똑같이 해주기 !
on/off 버튼 만들기(toHaveStyle)
1. on/off 버튼 파란색으로 스타일 줘서 만들기.
-> App.test.js
test('on/off button has blue color', () => {
  render(<App />);
  const buttonElement = screen.getByTestId("on/off-button");
  expect(buttonElement).toHaveStyle({backgrounColor : "blue"});
});
-> App.js
        <div>
          <button style={{backgroundColor : "blue" }}
          data-testid="on/off-button">
            on/off
          </button>
        </div>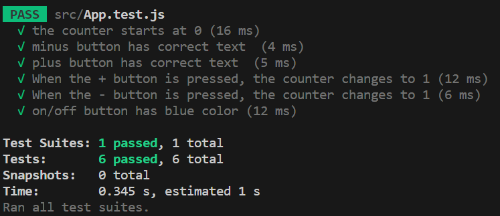
on/off 버튼 클릭 시 버튼 disabled
1. on/off 버튼을 클릭할 때 '-', '+' 버튼을 못 누르게 막기
-> App.test.js
test('Prevent the -, + button from being pressed when the on/off button is clicked', () => {
  render(<App />);
  const onOffButtonElement = screen.getByTestId("on/off-button");
  fireEvent.click(onOffButtonElement);
  const plusButtonElement = screen.getByTestId("plus-button");
  expect(plusButtonElement).toBeDisabled();
});
-> App.js
        <button data-testid="minus-button"
        onClick={()=>setCount(prev=>prev + 1)}
        disabled = {disabled}
        > - </button>
        <button data-testid="plus-button"
        onClick={()=>setCount(prev=> prev + 1)}
        disabled = {disabled}
        > + </button>
        <div>
          <button style={{backgroundColor : "blue" }}
          data-testid="on/off-button"
          onClick={()=> setDisabled(prev=> !prev)}>
            on/off
          </button>
        </div>
Github Action을 이용한 AWS S3로 앱 자동 배포하기
-> 앱을 배포하는 방법은 여러가지이다.
=> 우리는 Github Action을 이용한 AWS S3를 활용할 것 !
1. 저장소 생성

2. 저장소 연결 및 커밋
git init
git remote add origin https://...
git add .
git commit -m ...
3. workflow 생성

앱 배포를 위한 AWS S3 버킷 생성하기
#해외 결제 가능 카드가 없어서 AWS 가입이 불가능함 ;; 아래 내용은 직접 실천하지 못했음 ;;

AWS S3 버킷 설정 및 애플리케이션 배포하기
S3로 앱 자동 배포를 위한 yml 파일 완성하기
'React' 카테고리의 다른 글
09. 리액트 Version 18 (0) 2023.06.19 8. Next.js와 TypeScript (0) 2023.05.29 6. React TDD 기본 (0) 2023.05.22 5. Netflix 앱 완성하기 (0) 2023.05.10 4. Netflix 앱 만들기 시작 (0) 2023.05.07
